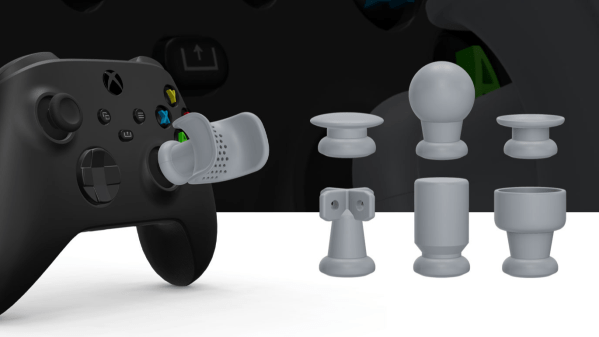
Microsoft has a history of taking accessibility options seriously for gaming controllers, and that trend continues with downloadable thumbstick toppers for Xbox controllers. Being straight from the source, the 3D models should fit as well as can be expected with a minimum of fiddling. Just make sure you select the right controller model, because they are each subtly different.
The toppers themselves come in different styles, and there’s a design to fit a variety of needs, from a thumb cradle to ones intended for more serious adaptations — the perforated X-shaped topper, for instance, is meant to anchor a custom shape molded overtop it.
A topless chess piece. (Credit: 3DprintedLife, YouTube)
We have seen a number of self-playing chess boards over the years, but the general theme has been standard chess pieces moved by either an internal electromagnet or an external robotic arm. This is, of course, a reasonable choice, as it reduces complexity, and sometimes you can even use standard chess pieces on a regular board. But what if each piece could move by itself? That seems cooler, so that’s what [3DprintedLife] did with 3D-printed chess pieces that are also tiny robots.
Although technically not the first, as you can buy the commercial Chessnut Move offering, this being an open hardware and source project makes it a lot more interesting, also because the general design is generic enough to be usable for applications other than just playing chess.
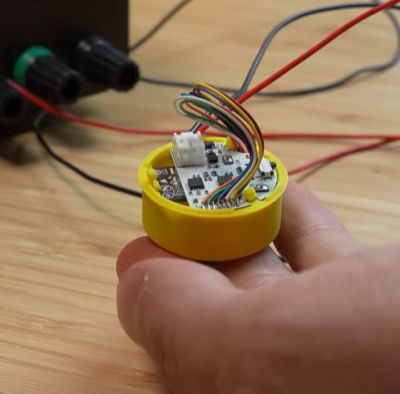
The MiniBots, as the individual pieces are called, are built around a custom PCB with an ESP32-C3 module, two PMO8-2 miniature stepper motors with requisite drivers, a magnetometer, and are powered by a 170 mAh LiPo battery. Communication with the central hub is done using ESP-NOW, with each MiniBot using its own dedicated channel.
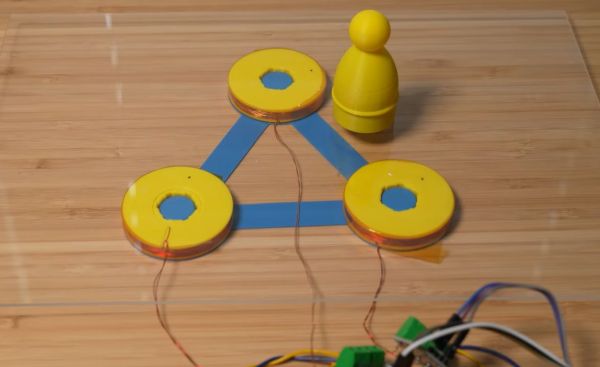
This hub’s mainboard also runs on an ESP32-C3 for the wireless interface, while the processing is handled via a serial link with a Raspberry Pi SBC that runs the main Python-based software. Localizing the individual pieces on the board is done by scanning electromagnets embedded in the board and using the readings from the individual magnetometers to triangulate the positions.
Although at the end of the video a basic prototype sort of works, the ESP32-C3, being a single-core MCU, tripped up the firmware, necessitating some changes that should be in the next update, along with power saving and easier recharging being issues to address.
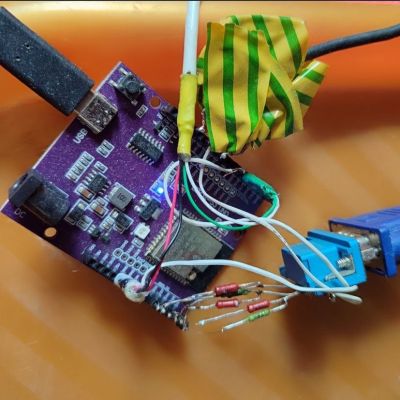
ESP32-S3 board with VGA and audio output during development. (Credit: Ivan Svarkovsky)
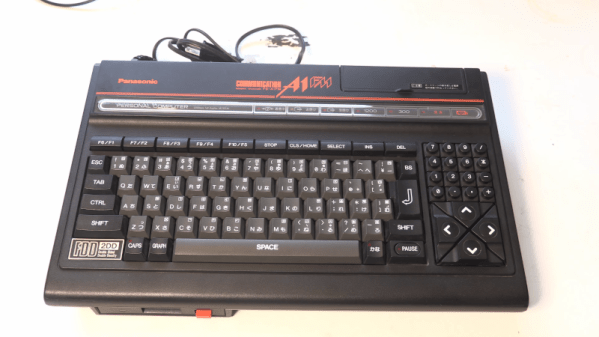
The ESP32-S3 is by many metrics quite the powerful little computer, which has led to it being used even for things like emulating retro consoles and similar. Here [Ivan Svarkovsky]’s S3-MSX-PC project pushes the envelope by taking the multi-system Retro-Go project’s MSX component and optimizing it for the ESP32-S3’s Xtensa Lx7 CPU cores.
The project involves an ESP32-S3 as the core, requiring at least 8 MB of PSRAM (N16R8 configuration) to match the tested configuration. Any software is loaded into PSRAM before it’s executed, with the MSX1, MSX2 and MSX2+ supported.
For audio you have to wire up your own PDM filters to connect to the two GPIO pins that are used for audio output, while VGA output is handled by a basic 2-bit R-2R RGB222 DAC. For input devices you can use any USB keyboard, while software is added via the web interface or directly onto an SD card.
The Technical Deep Dive section goes into more detail as to what exactly got changed – with the blessing of the fMSX author – in the original fMSX core, such as targeting the Lx7 core’s cache dimensions and optimizing hot paths to avoid bottlenecks. Memory accesses were aligned for Xtensa and moving certain data from Flash to RAM was another change, along with the prevention of pipeline flushing due to certain branching decisions.
Considering that MSX specifications are based on a Z80 core, it’s not so crazy that one of these ESP32-S3 MCUs can effectively emulate them. The Retro-Go project itself claims to cover a whole swath of Nintendo and Sega consoles, as well as others, making it almost too easy to do some retrogaming without even having to drag out a Raspberry Pi SBC or so.
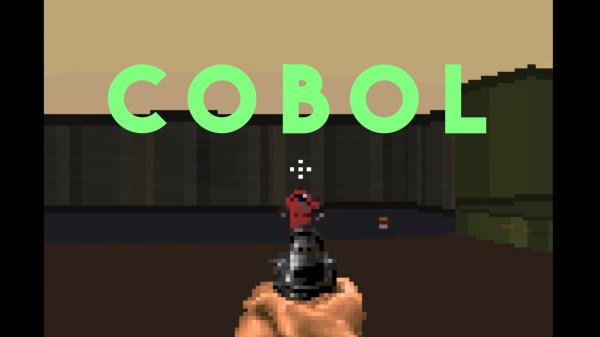
COBOL is not the first language anyone would ever think of when writing a First Person Shooter– after all , it’s the Common Business Oriented Language, not the Common Game Oriented Language. For Youtube-based hacker [icitry] though, that’s the point. The only way to determine if COBOL would be enough to write an FPS game was to do it.
Sure, you could rest on your laurels knowing that the language is Turing complete and therefore capable by definition, but what’s the fun in that? Now the pipeline for this game is as hacky as anything– COBOL doesn’t exactly have a robust graphics stack or a lot of libraries for pushing pixles, so he’s outputting each frame of the game as raw bitmap to STDOUT, and letting ffplay assemble the images. Control enters the same way, with the terminal set to raw input and the COBOL program reading STDIN.
As for what the images consist of, he’s going for a standard Wolfenstien-inspired raycasting shooter. [icitr] provides a decent explanation of the raycasting algorithm, along with why implementing in COBOL is a silly thing to try. That’s a theme here; he’s able to implement sprites and the logic to move and attack enemies, while constantly complaining about COBOL. If that wasn’t enough, he adds variable-height sectors to bring this much closer to a true DOOM clone. By the end, there’s a full game. It’s all up on GitHub on an Apache license.
While this video is not the most gentle introduction to COBOL, it does show you can hack the business-specific language to do whatever you’d like.
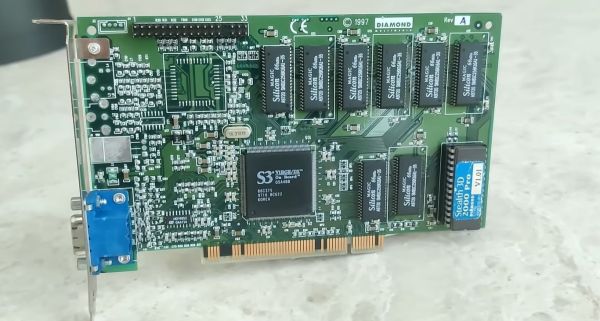
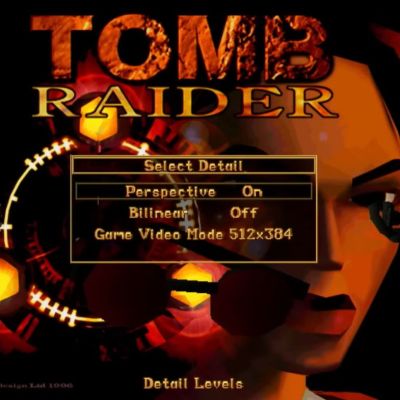
The special 512×384 mode with S3 card installed. (Credit: Bits und Bolts, YouTube)
Back in 1996 the 3D gaming market on PC was beginning to heat up, with hot new titles like Tomb Raider coming out that year and requiring much more graphics power than what was needed for old titles like Doom and Duke Nukem 3D to experience good graphics. Thus you had to pick some kind of 3D accelerator card to buy. Here a common joke was that of the available options, the S3 Virge GPU was so bad that it was actually worse than running in software rendering, but was this true? Cue [Bits und Bolts]’s investigation to finally put this myth to rest.
On software rendering mode a zippy Pentium 166 would struggle to render at 640×480 resolution, so if you wanted more than 320×240, or really knock down graphical fidelity, you had to get that 3D accelerator card. After combining a P166 with an S3 Virge/DX – a minor update to the original Virge – the Tomb Raider game was first compared while running in 512×384 resolution, which the game offers you with an S3 card installed along with bilinear filtering.
After hitting a capped 30 FPS on that first test, 640×480 was tried and hit a solid 15 FPS with bilinear filtering enabled, but the conclusion is basically that the special 512×384 resolution mode is pretty good. Perhaps the main causes of the myth was the wide variability in quality of the various GPUs using the S3 Virge chip, as well as trying to run at anything other than this special resolution which appears to target the card’s strengths.
For those who have never played the hit video games Undertale and Deltarune, the games are partially known for their interesting characters, many of which have eerie, surreal, and expressive designs. One of the more memorable characters from Deltarune is Tenna, a game show host of sorts whose distinguishing feature is an old television as a head, as well as a colorful suit. As a result he’s been the subject of a number of recreations by various cosplayers and makers like [BigRig Creates].
This version of the character was actually inspired by a previous build by [BunnyBii] which used an iPad as the interactive screen/face. Inside the television, though, the actual human found this to be front heavy and limiting in the ways that it could be used interactively, especially since the only way to see the outside world in this version was with a small endoscope and screen. [BigRig Creates]’s version builds on this idea but swaps out the iPad for a Raspberry Pi, allowing for much more customization, and uses a pair of Xreal glasses instead of a screen for the view of the outside world from in the television.
To get the whole costume together, the head is 3D printed with all of the electronics inside, and a game controller integrated into a handheld microphone controls the animations shown on the screen. A vibrant, custom-tailored suit with white gloves rounds out the ensemble, along with a pair of 3D-printed shoe covers since actual yellow shoes were a bit pricy. There were some interesting problems to solve along the way, specifically with regards to power management for all the electronics, but in the end it all seems to have come together quite well. [BigRig Creates] is no stranger to builds with unusual displays, though; one of our favorites was the world’s largest Nintendo 3DS.
Operating systems are great things to have for general purpose computing, but sometimes they can just get in the way. There’s RAM overhead and processor cycles required for all that operating, after all. For something like a game system, it seems unnecessary. The NES certainly did well enough without an OS, as did its various successors for several console generations.
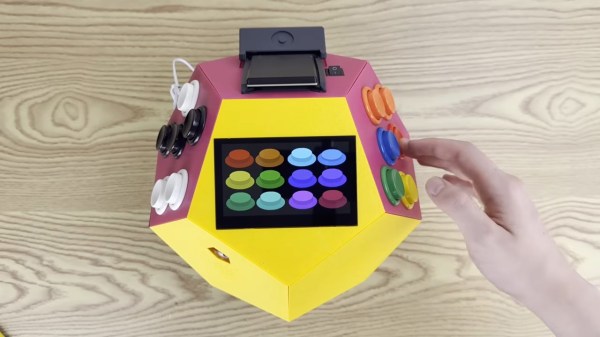
[Inkbox] wanted to get back to those heady days by programming bare-metal games for a Rasberry Pi 3 that had sat unused since 2016. Games are on cartridge, running bare metal, in assembly — as God and Masayuki Uemura intended. Also, the console is a dodecahedron, because the name GameCube was already taken.
The GitHub link above doesn’t exactly have documentation, at least as of this writing, so you’ll need to watch the video to get the full details. The dodecahedron form factor might not be ideal for packing away in a bag, but as a handheld we have to admit it does look comfortable to hold. Two faces of the dodecahedron get a half-dozen buttons each, which are wired to a GPIO pin on the Pi via a Schmitt trigger for hardware debounce. Like all good consoles, it uses cartridges, these ones being adapted from SD cards on large PCBs derived from a project we featured before.
That all sounds great, but it’s the assembly programming we’re really interested in — skip to around the seven-minute mark in the video for that. Ultimately it’s a build video, so not the ideal tutorial for ARM assembly programming, but it might not be a bad introduction for some. Unfortunately you don’t get line-by-line of the PacMan game he put together — but he does have it in the repository for you to examine. The repo also has STLs if you want to make a dodecahedron of your own.
Of course he’s got a RetroPi cartridge as well, loaded with emulators, and we suspect that’s mostly how this GameDodecahedron will get used. Still, we’ll always have a soft spot for assembly code and projects that use it — be it on ARM, good old 6502, the open-source RISC V architecture, or even the absolute monster of op codes that is x86.