Process 4 Billion Pixels Per Second From 16 DIY Cameras For The Best V-Tubing Rig Ever

[Dennis] is on YouTube with his channel “Made By Dennis,” but for the record he is a maker, not a V-tuber. On the other hand, his latest project– creating a profesisonal-level tracking rig with DIY IR cameras and a whole lot of moxie–does mean he’s now equipped to make the move to the prestigious, high-status world of pretending to be an anime girl.

That is of course not why he did it. Like most projects around here, the motivation was more a case of “I wonder if I can…”– in this case [Dennis] wondered what it would take for him to pull off the same sort of optical motion capture, or MoCap, that is used in Hollywood studios. Optical mocap has the advantage of being very precise, able to track things at high speeds, and not being in any way limited to the human form like the slew of AI-assisted methods hitting the market right now. The disatvantage is that you need to place markers on any part of your subject you want tracked, film them from all angles, and process a whole lot of pixels. In [Dennis]’s case, it ended up being about four billion. Keeping in mind that actually locating those points in 3D space is dependent on knowing exactly where your cameras are: if you want sub-millimeter precision, your cameras need to be fixed with sub-millimeter tolerance. It’s a big project, hence a long video, which is embedded below.

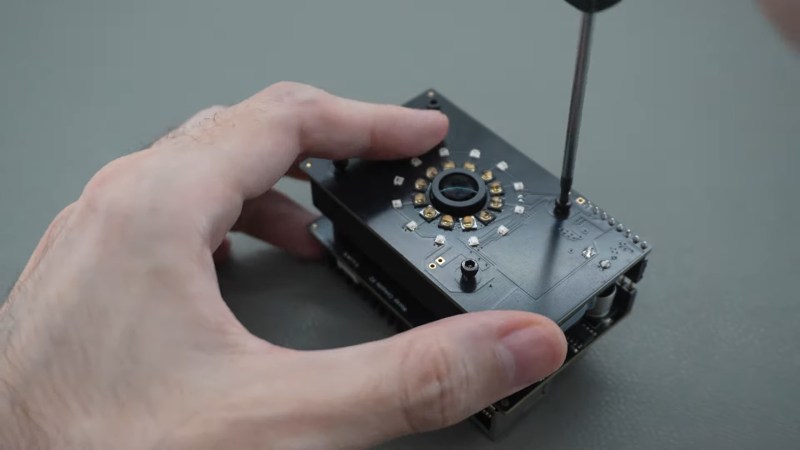
The DIY cameras use a AR0234 MIPI camera on a custom PCB with M12 lenses and IR filters. To improve the signal-to-noise ratio on optical MoCap, it’s standard to use near-IR light. The camera boards, as you might expect given the MIPI interface, hook into Raspberry Pi compute modules– the cheapest CM4 should work, though he’s using CM5s. The compute modules sit on custom boards that provide PoE, and some other niceties– like a small microcontroller driven by the pulse-per-second pin to help trigger the cameras in sync.

Each camera gets a ring light of near-IR LEDs that pulse at 160 W, which would be way more than PoE is specced to provide, but since the LEDs are only on when the camera is taking a frame, the average power is well within allowable limits. With 16 cameras each having their own ring light, that’s a lot of near-IR photons. Don’t forget your safety squints!

Rather than process the images with OpenCV, he has his own custom solution optimized for this use-case that [Dennis] reports is 300x faster. Luckily, he’s put his implementation on GitHub, along with the rest of the project. Even if you don’t have any v-tubing ambitions, this project is very impressive and worth checking out in its entirety.

Optical MoCap isn’t the only game in town, of course. If you want to do this cheap and easy, you can strap a bunch of IMU sensors to yourself– just don’t expect the same precision.

Thanks to [Dennis] for the tip!
Continue reading “Process 4 Billion Pixels Per Second From 16 DIY Cameras For The Best V-Tubing Rig Ever”

4:3 screenshot? Either period-appropriate hardware or a VM.

Meshcore And Haiku: A Match Apparently Made In Italy

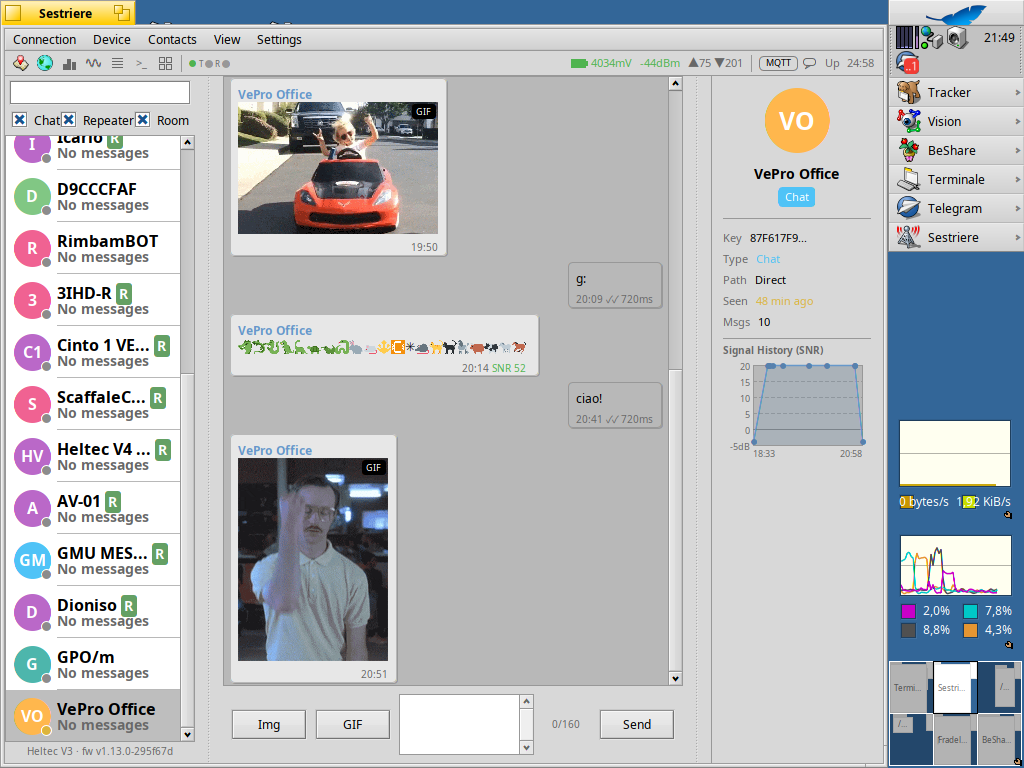
No, we’re not talking about cultural appropriation of Japan’s most famous form of short poem–this is the other Haiku, the open-source descendant of BeOS, which now has a fully-native meshcore chat client called Sestriere, thanks to the efforts of one [Atomozero]. Of course you’ll need a LoRa radio to act as a modem, but anything that speaks USB serial– which is any of the ESP32-based offerings on the market–should work.

This is interesting in that we don’t see many desktop applications leveraging LoRa networks– meshtastic or meshcore– so for one to appear for the relatively-obscure BeOS derivative is just neat. It’s also a nice peice of work: the chat window is full featured, organizing your contacts, and communicating not just with text but emojis and reaction GIFs. GIFs seem a bit extravagant for LoRa bandwith, but apparently it works. There are also Codec2-based voice messages, another thing that we didn’t expect to see over LoRa, since most ‘chat’ projects restrict themselves to text messaging.

The chat window. One nice thing about Haiku APIs is that look-and-feel isn’t in question.

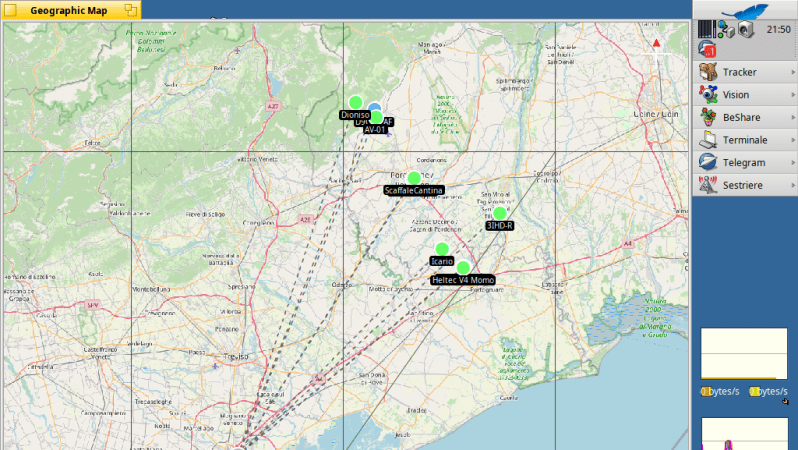
The software will also map all the nodes with which you are in contact, both diagrammatically and geographically, overlaid on OpenStreetMap tiles. The network map conveniently colour-codes your contacts by the link quality, but what’s even more interesting is the WireShark-inspired packet sniffer built into the software to let you keep a really close eye on traffic on the mesh network.

Neither Haiku or MeshCore are to everyone’s tastes, but as an OS it is a worthy daily driver, even if you have to jump through some hoops to install it if you have a UEFI-only system.

If you need more range, try a Yagi.

DIY CO2 Scrubber In DIY Sub By A Hacker Braver Than Most

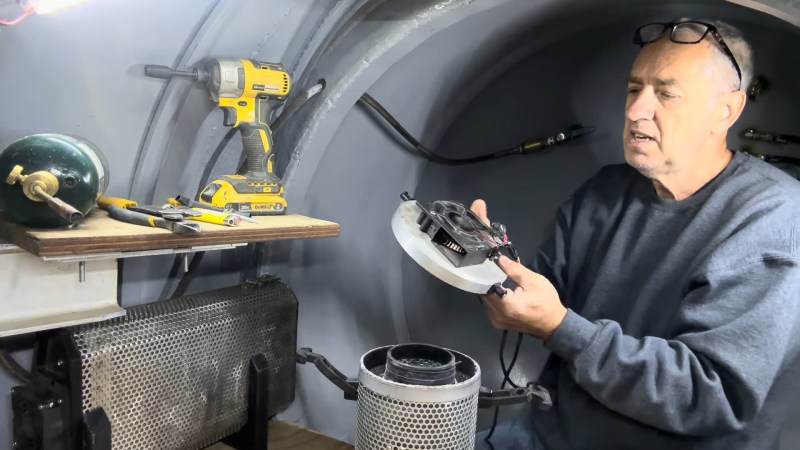
If you look around your environment, you can probably pick off quite a few things that you’ve made, at least if you’ve been at this a while. You probably aren’t reading this from the bottom of a body of water though, which means you lack the incredible confidence of submarine builder [Hank Pronk]. Not only is he building himself a capable-looking diesel-electric submarine over on YouTube, he’s even DIYing CO2 scrubbers for it! Yeah, that’s a man who believes in himself.

Luckily [Hank] is not anywhere near the Caribbean, so needn’t worry about being misidentified as a narco-sub, but he still has to be concerned about his oxygen supply when tooling around beneath the local lakes. Perhaps more important than the oxygen supply in a sub is the build up of CO2. It doesn’t matter how many oxygen tanks you bring down with you if you can’t scrub CO2 out of the air to make room for it. Just like the Apollo missions, he’s using a chemical adsorbent to take carbon dioxide out of the air — and just like Apollo 13, he’s switching from square to round.

Or, rather, from a rather rectangular commercial model to a DIY little round unit. That’s because he doesn’t need the big scrubber in this sub: being diesel-powered, he expects to spend a lot of time at snorkel depth, where both the pilot and the engines can get clean air through the tube. Dives are expected to be short, and in that use case, too big of a CO2 scrubber is really a waste. If for some reason he gets stuck on the bottom, well, the lake isn’t that deep. He can swim to surface, and has a detailed bailout plan. If he wants to stay under overnight to avoid bailing at night, he’s carrying enough extra adsorbent for that.

There’s a reason almost every submarine we’ve featured on this site over the years is an ROV. It’s not that a homemade submarine is automatically a death trap, but you sure do have to be confident in your design.

Continue reading “DIY CO2 Scrubber In DIY Sub By A Hacker Braver Than Most”

Pi Media Player With VCR Vibe Is Perfect For CRTs

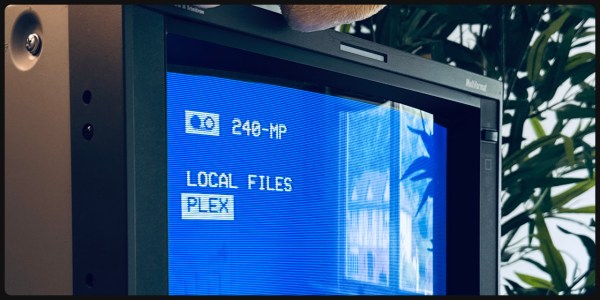
If you have a TV and a Pi, you have the workings of a media center, and you’re not exactly short on options for software. But options are good, so here’s one more by [Anthony Caccese] — a player called 240-MP that explicitly targets CRTs with its retro stylings, released under the GPLv3 license.

Don’t let the name fool you, though. While the blue-and-white styling is very evocative of 90s VCRs, the output isn’t limited to 240p. If you’re running it into a vintage CRT over composite, as [Anthony] does, sure, it’ll do that. If you want to use HDMI on a modern TV, however, that’s an option too, in 4K if that’s your jam. Higher resolution video will need a beefier Pi, of course, but MPV can handle the files, and ultimately this is a wrapper for MPV. You still get the vintage styling, which can do green-and-black as easily as white-and-blue, as well as whatever custom color scheme you want to define. It might not look quite as good if it’s not on a display tube, but we could see this as a good fit for a plasma TV, too.

As you can see in the demo video embedded below, the player is equally happy listing and playing local files — including playlists — or streaming via a PLEX server. Other add-ons, for example to launch emulators, may be forthcoming. Of course, if you’re not willing to wait you could always code them yourself.

Given the roots of this project in old VHS interfaces, we’re somewhat surprised there doesn’t seem to be an option for control via physical tokens. We’ve already seen projects that try and replicate that portion of the VCR magic, though. If it’s not the tapes you miss from back in the day, you can also simulate cable TV.

Continue reading “Pi Media Player With VCR Vibe Is Perfect For CRTs”

Automatic Tutorial Generator Is Perhaps The Best-Case For Vibe Coding

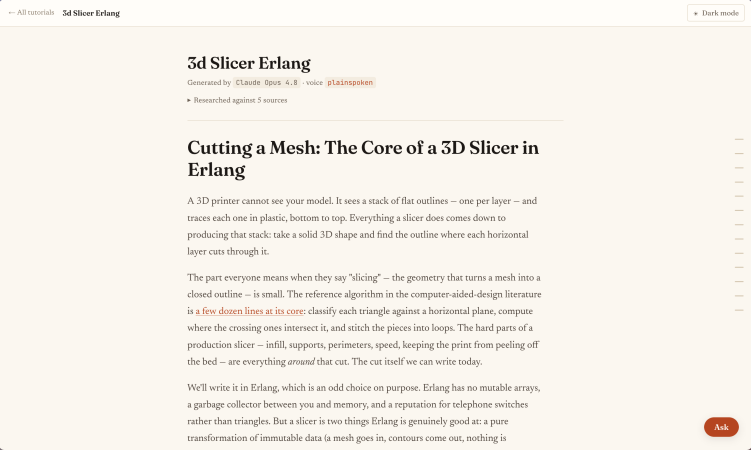
Quick question: how did you learn to code? It probably wasn’t bribing someone a year or two ahead of you in CS to finish all your homework, but that’s exactly what ‘vibe coders’ are doing — even in class. Odds are, you learned by working through exercises, following tutorials, and doing it yourself. Finding good tutorials isn’t getting any easier in the age of LLMs, and that’s where [Deven Jarvis]’s Lathe comes in: it’s a project to get an LLM to make the tutorial for you. Instead of doing the work for you, it gets the clanker to show you how to do it yourself.

Everyone’s different, so this may not apply to you, but it’s a journey/destination sort of problem. Some people just want a piece of software, and they can vibe code until the oceans dry up and will have no interest in this project. Other people take great joy in learning how to do things; [Deven] is one of those. A good tutorial is a great way to learn, since it artificially softens the learning curve compared to just jumping into a project with a man page or a datasheet.

Of course you’re still faced with the hallucination problem, something [Deven] admits in his excellent write-up. As he points out, the advantage is that you can call whatever model you plug into Lathe on its BS, and try and get a correct answer. Try that on Reddit, or most other places online. Sure, the tutorials aren’t going to match the best human-generated content, and [Deven] admits that. He’s using it for topics (like slicer design) that don’t have easy tutorials online — and sadly, his prediction that nobody is going to bother making good learning resources like they used to when they’ll just be scraped by LLMs is very likely true. It’s not that your options are vibe code or vibe-generated tutorial, but if that’s the direction the world is going, we’ll take the tutorial, thanks.

Getting the LLM to hold your hand through a tutorial might not appeal to the most Butlerian among us, but it’s a big step from that to the full cognitive surrender some people worry about.

Pico-Driven Ultrasound Enables Scaled Acoustic Model Of Home Stereo

There are plenty of ways to get sound into your house: good old fashioned headphones, the Dolby surround setup we all lusted after back in the day, or the 21st century’s ubiquitous soundbar, with its ‘spatial audio’ magic. Which will work in your space? If you were an audio engineer, you’d set up listening area and use a microphone to map the space– but that would be thousands of points and sounds like tedium. [PlasmatronX] had a better idea: use Schlieren imaging to see the sound waves as the travel through the space. Schlieren imaging has trouble with audio frequencies, though, and imaging the entire living room was going to be difficult. So he scaled it all down– including the sound waves, by shifting to ultrasonic frequencies.

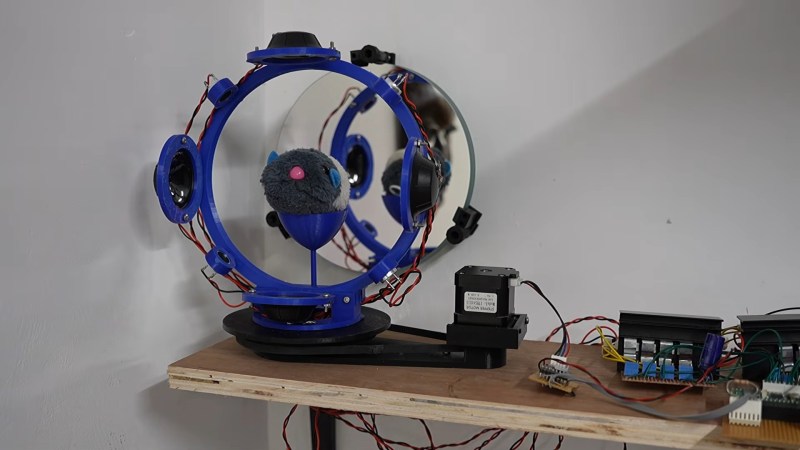
He’s using the usual mirror-and-razor Schlieren setup with an 8″ telescope mirror– and if you don’t know what that is, we did a deep dive on this kind of optical flow visualizer a while back. Inside the circular imaging area where that lets him see density changes, he’s set up what he calls a CAT– Computer Acoustic Tomography– array. It’s a rig on a turntable he can set up ultrasonic transducers on, to match the various speaker setups he wants to test, and turn so he can see from all angles what the scaled-down waves are doing. To capture those waves, which aren’t going to be standing still, he adds a stroboscope. All the ultrasound signals are being generated by a Pi Pico, and are scaled 4:1 in the frequency domain– that is, a high 10kHz whine becomes inaudible 40kHz. Those signals are fed through a DIY 8-channel amp into both ultrasonic transducers and larger ‘cat-repellent speakers’ from AliExpress.

The microcontroller is actually a Pico 2W, which is using its “W” to communicate via Bluetooth with a Pi 4. That SBC is running the camera, the stepper for the turntable, and image processing, along with the timing for the audio signals. After that it’s a matter of setting up a scaled down 7.1 surround setup and itty-bity soundbar, and test it on a (stuffed) guinea pig. Obviously you can see a big difference between the steered beams from the tiny soundbar and the true surround, but how that translates to listening pleasure will be at least somewhat subjective.

What’s less subjective is the obvious effect soft furnishings add to the simulation. Now he doesn’t take the time to find a material that will scale the frequency response of a set of curtains, but we’re not sure how much that matters. At 5kHz or 20kHz, they’re going to deaden sound, and you can see that here, and you can see it’s a much bigger deal for the shaped beams of the soundbar than it is for surround sound. In the end, [PlasmatronX] decides to stick to headphones, but the whole video is very much worth watching, so we’ve embeddded it below. If you want to try it yourself he’s put his code on GitHub.

Thanks to [PlasmatronX] for the tip!

Continue reading “Pico-Driven Ultrasound Enables Scaled Acoustic Model Of Home Stereo”

Bluetooth Gramophone Has Surprisingly Contemporary Roots

So you happen to have a gramaphone– maybe a big old Victrola/HMV, perhaps a Columbia– regardless of brand, it’s a big, beautiful conversation peice for your living room. It might not be the most practical listening device, since isnomuch as there is a vinyl renessance, it’s restricted to vinyl, not the old shellac 78s the these all-mechanical beasts were born for. [JGJMatt] decided to bring his gramophone into the 21st century, turning it into a bluetooth speaker without altering any of its original internals.

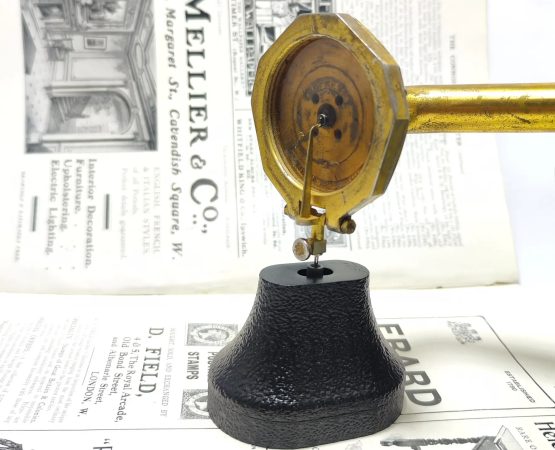
What’s really interesting is that this hack was once a commercial product– sort of. Back in the 1920s when everyone was listening to Jazz, the problem of ‘ what do I do with this massive gramophone cabinet when I’m not cutting a rug?’ was equally valid, and a solution was found: the Dulce-Tone Radio Speaker. A very weak speaker sits under the needle, turning the gramaphone mechanism into an amplifier for the radio. The very same concept, [JGJMatt] would work equally well in the 2020s with a bluetooth signal as in the 1920s with an AM one. There’s no demo video for this project, but you can hear how its 1920s inspiration sounded in the video below.

The driver for this device is made using a neodymium magnet and the voice coil from a 3W speaker. A 3D-printed needle-holder captures the gramophone’s needle– a much thicker and sturdier thing than the tiny diamond-tip you’d find on a modern turntable, we should note– and holds the magnet to it. The voice coil gets driven via a MH-M38 bluetooth module, and everything is held in a nice 3D-printed case along with the battery.

The hack is, of course, totally reversible: at any moment, you can remove the needle from this device and drop it on a 78 for some Jazz-era fun, or swap back for 21st century brainrot. If you happen to have some of those old shellac records and a modern turntable, note it takes more than the right RPM to get good sound. Continue reading “Bluetooth Gramophone Has Surprisingly Contemporary Roots”